
A hand-knit heel is the BEST!
It’s literally been YEARS since I’ve knit a pair of socks. It’s probably a good idea that I do a practice pair before making the Christmas present I’m planning, then, right?
You can’t really “measure twice, cut once” in knitting.
I forgot how comfortable a hand-knit heel is! It’s just about the most comfortable place for a foot to be. Knit socks can be custom knit and will fit your foot like a glove.
They’re a lot easier to “string together” than people make them out to be…
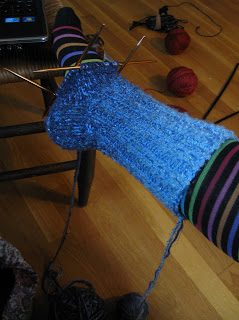
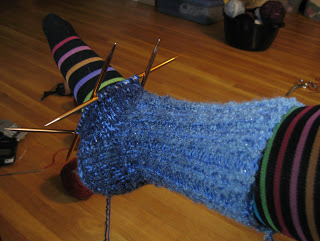
The pattern I use is pretty simple. I always do a rib for the ankle part, because I think it holds them up better. You can knit elastic into the first few rows to help as well.
Basically this is all you need to know:
CO and knit in the round on DPNs.
I used size 8 needles and a few strands of yarn knit together.
Knit the leg portion until it’s “long enough” for you. When you’re ready to do the heel you only need to work half the sts you cast on. Add a reinforcement yarn to help the heel wear better over time. Work back and forth for two rows less than you have sts.
FOR EXAMPLE: if you CO 30 sts, work 15 for the heel. Knit on the outside and purl on the inside of the heel. Work 13 rows.
After the heel rows, divide the sts evenly onto 3 DPNs. Any extra sts should go on the center needle. First row: Work to last st on middle needle. Slip one, knit st on next needle, and pass slipped stitch over this one. Turn work. Second row: Slip first st, work to last st on middle needle, and knit or purl together with first st on next needle. Turn work. Repeat second row until all sts on outer needles are gone. You should have the same number of sts on the center needle that you started with.
Next is the “gusset”. You will need to pick up half the amount of sts that you have rows for the heel, plus one. Pick up these sts on each side of heel. Make sure to pick up the “plus one” carefully where the heel meets the sts that were set aside, to prevent a hole from forming at the ankle.
FOR EXAMPLE: If you worked 13 rows, divide by 2 and round down to 6. Add one, and pick up 7 sts on each side of heel.
Knit one round, being careful to knit this row a little tight to make sure everything comes together and holds.
On the next round K2tog at edges of heel. Two decreases in a round.
Knit next round.
Repeat decreases until you have the number of sts you cast on in the beginning.
You can continue knitting in the round until the length from the tip of your heel to where your toes start, is the same on your foot as it is on your sock.
When you’re ready to work the toe make sure the sts you have are divided onto four needles. There should be a needle transition (or gap where the sts are seperated onto different needles) on the sides, middle of top, and middle of bottom of the sock. It doesn’t have to be exactly even, but the closer the better. You can also add a reinforcement yarn to the toe now.
First row of toe: beginning in the middle of the top of the sock. Knit to last 3 sts on first needle. K2tog and then knit last st. On second needle knit one, slip one, knit one, and pass slipped stitch over. Knit to end. Knit to last 3 sts on third needle. K2 tog, and knit last st. On fourth needle knit one, slip one, pass slipped stitch over, and knit to end. Knit one round. Continue decreases and knit rounds until you have about 8 sts left. Cut work yarn, leaving a tail, and string this through the last sts. Pull tight. Weave in ends.
Now repeat one more time and you’ve got HAND KNIT SOCKS!!
